Benefits: Passes both sides of the stitch with 1 insertion (avoids tissue bridges and girth hitches). Retractable lower jaw (allows access to tight knees, and allows removal from knees with mobile menisci). Needle extends into the posterior gutter through the tip of the lower jaw (does not touch chondral surfaces). Smaller lower jaw tooth (easier insertion of the lower jaw under the meniscus). Upper jaw curved to follow the shape contour of the femoral side of the meniscus and femoral condyle. Compared to hybrid all-inside devices, inside-out and outside-in repairs. Enables anatomical reduction and uniform compression. Each stitch repairs the top and bottom of the tear. Designed to eliminate neurovascular risk. Avoids excessive capsular entrapment. Repairs effectively in front of the popliteal hiatus. Enables side-to-side radial tear repair, and top-to-bottom horizontal tear repair. Significantly smaller needle than used by hybrid all-inside devices.
Surgical pearl: A spinal needle should be used to establish the skin incision location of the working portal. The optimal skin incision location is one where a spinal needle can be inserted such that the distal end of the needle is parallel to the region of the tibial plateau under the meniscus.
Justin Saliman, MD, Cedars-Sinai Orthopaedic Center, Los Angeles CA
Mitek Sports Medicine (www.depuysynthes.com)
Mitek Omnispan
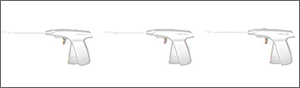
The Mitek Omnispan Meniscal Repair System is an all-inside arthroscopic meniscal repair device. It consists of a low profile needle, pre-loaded with 2 PEEK backstops and No. 2/0 Orthocord High Strength Orthopaedic Suture, which is delivered using the Omnispan System Applier. The needles come in 3 angles (0°, 12°, and 27°) and the Applier is a single-patient, multi-use design, meaning the same Applier can be used for multiple implants with a single patient. The needles also have a safety sleeve over each set of implants to prevent delivery failure. Once the needle is attached to the Applier, the device is inserted into the knee. Using the gray trigger, the first implant is delivered into the meniscocapsular region. The red trigger is then pulled, advancing the second implant. Once appropriate positioning of the second implant is determined, the gray trigger is fired again. The surgeon pulls on the sliding knot advancing the suture through the implants creating a suture bridge over the tear. The final repair consists of Orthocord Suture spanning the meniscus, while the PEEK backstops are embedded in the meniscocapsular area only.
Surgical pearls:
An adequate portal opening is paramount for successful implementation. I widen my portal with an instrument clamp to allow easy passage of the Applier. It is usually necessary to switch the camera back and forth between both portals to gain access to the angles needed to create the repair. I also always use a skid when inserting the Applier to prevent soft tissue impingement.
The surgeon should always check to make sure the implant is properly loaded on the back table, ensuring it is fully inserted into the locking mechanism and loaded in the correct direction.
The surgeon should hold the Applier firmly when firing the gray trigger, as some kick-back does occur.
The Applier should remain in the joint throughout the advancing and deployment of implants, so the surgeon can maintain visualization with the scope. Once the implants are in position, I then remove the Applier from the joint space.
Use a probe to place counter-pressure on the meniscus when tightening the suture. The sliding suture system is a double-loop design. In order to smoothly advance the suture, I recommend that a probe be placed on the smaller loop closest to the meniscus, so that when the suture is tightened, the probe is under the smaller loop. A gentle back-and-forth pulling maneuver between the free suture and the probe creates a smooth transition during tightening.
Scott A. Sigman, MD, Chief of Orthopedics, Lowell General Hospital; Team Physician, UMass Lowell
Smith & Nephew Inc. (www.smith-nephew.com)
FAST-FIX 360
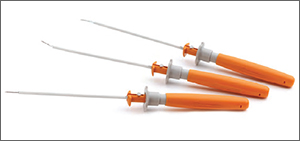
The FAST-FIX360 design enables you to deploy implants in any hand position—vertically, horizontally on either side of the meniscus—with a fast, smooth advancing motion. This spring-action design facilitates the advancement of each implant into the capsule. Smaller implants and pre-tied, self-sliding knots made of ULTRABRAID 2-0 Suture create smaller needle insertions, reducing disruption to the meniscus. Low-profile, stiffer needle shaft improves control while enabling access and visibility to hard-to-reach areas of the meniscus. Set needle depth penetration from 10 mm to 18 mm with the push of a button. The FAST-FIX 360 System has biomechanical properties that best reproduce the vertical mattress suture technique.
Surgical pearl: Assess tear pattern and reparability, then reduce and template repair construct and suture points. Precisely select portal insertion sites, ensuring perpendicular vector needle delivery at the repair site. Measure the meniscal fragment size and rim width, setting the depth penetration limiter (usually set to 15 to 18 mm). Insert first anchor posteriorly and superiorly or away from the insertion portal and then after deployment, insert the second anchor anteriorly and inferiorly or into the “near” tear fragment. Tension the suture using the knot pusher/cutter as a “suture stent” to manually “pull and push” the suture, compressing the repair construct and coapting the tear. Avoid “over-repairing” the tear by spacing out sutures at 3 mm to 5 mm and alternating femoral and tibial undersurface placement.